Telos Zero Wallet
Here is a video to show you how to get a native wallet set up!
If you want to use your hardware wallet we have you covered!
You can also follow the written guide below.
Since Anchor is a signer and not a wallet, we will be using it in tandem with the Telos Web Wallet.
Step I - Create a New Account
- Go to Telos Wallet
- Click the "TELOS ZERO" tab
- Click "Create a New Account".
- Choose an account name.
- Save & store your public and private key somewhere safe.
- Press continue to create the account!
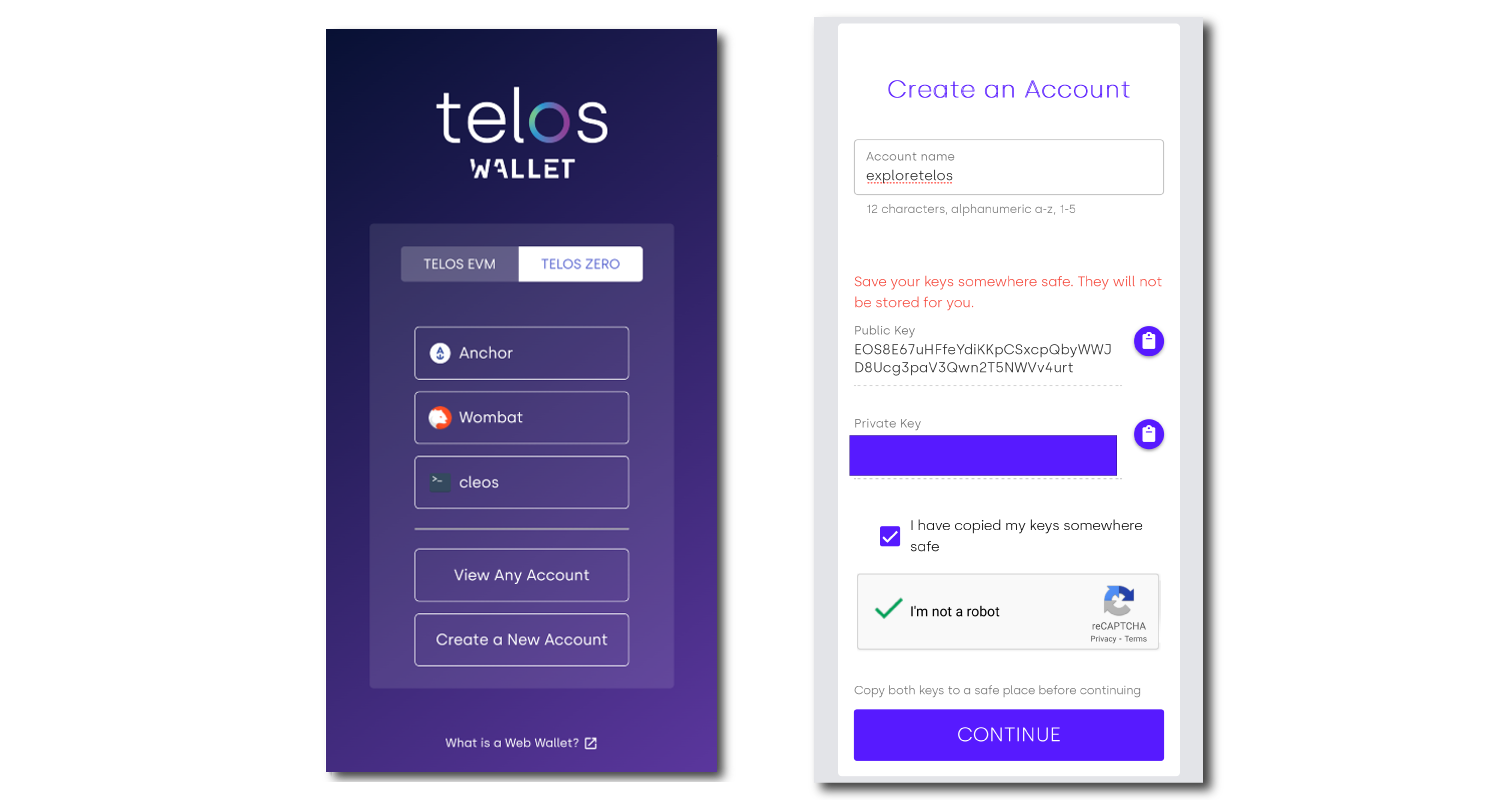
Telos account names must be 12 characters long and can only contain letters a-z, and numbers 1-5.
If your private key is lost or stolen you lose control over your account and wallet. Please keep your key/s safe!
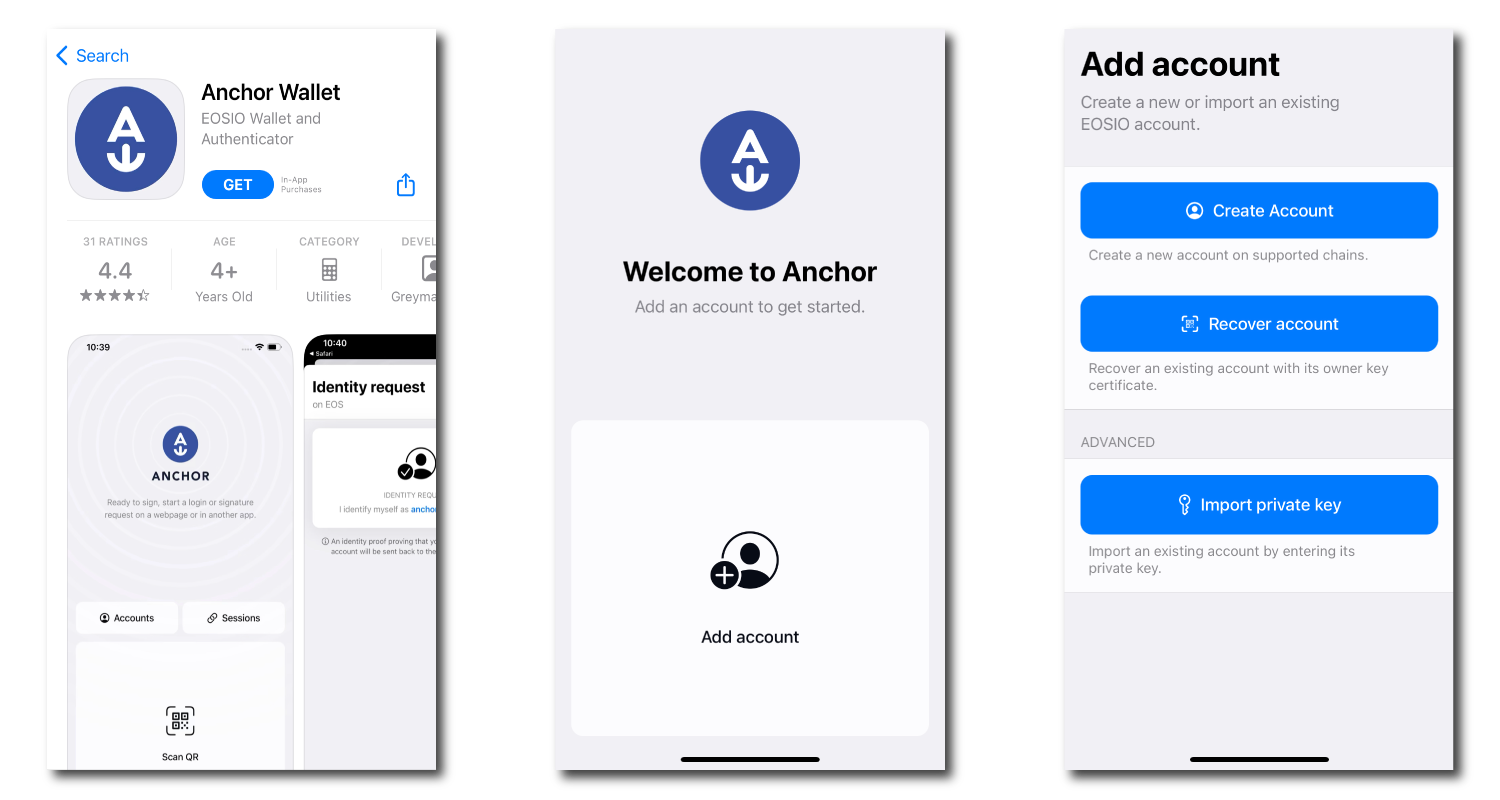
Step II - Get Anchor To Sign For Your Transactions
- Download Anchor here
- Open Anchor and click "Add account".
- Click "Import private key".
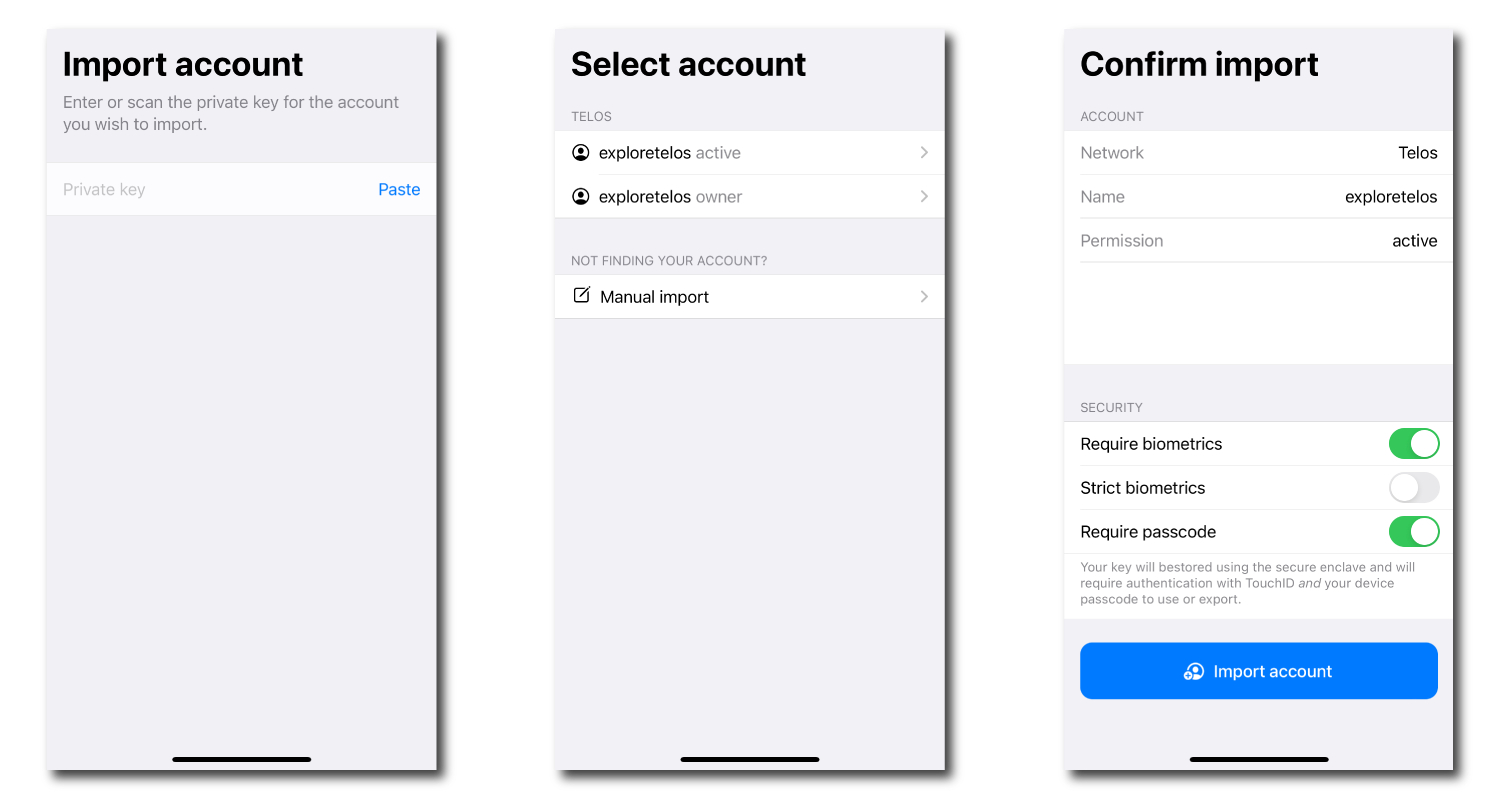
- Paste in the private key we saved from earlier.
- Select the account to import.
- Confirm the account, choose your security settings and click "Import account".
Anchor isn't a wallet. It is used to authenticate all transactions and interactions you may make with dApps on the native Telos ecosystem. In the example, we are using the mobile app version. Desktop versions are similar.
Step III - Log Into The Telos Web Wallet
- Head back to Telos Wallet
- Click the "TELOS ZERO" tab
- Click "Anchor".
- Now use Anchor to authenticate and log in to your Telos wallet.
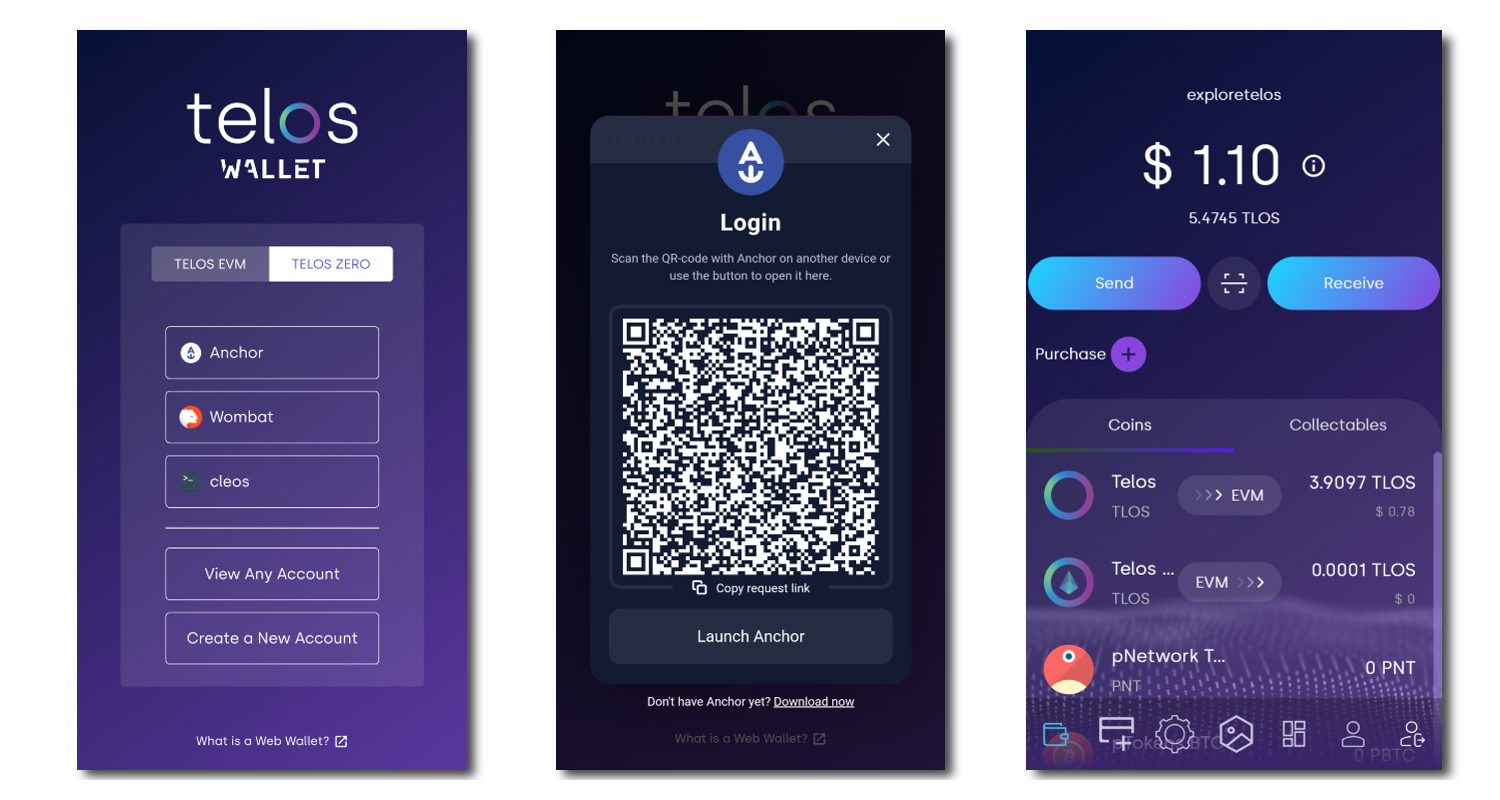
With the Telos Web Wallet, you can send, receive, stake and more!
What's Next?
Now that you're set up on the Telos native chain, you can fund your wallet and check out all that AreaX NFT has to offer! It is one of our native chain marketplaces!